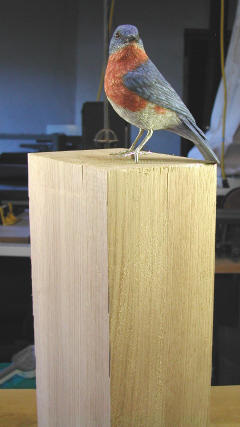
Allrighty- the fence post was done in 3.5 hours! Amazing, I had figured it would take a few days. After feeding the cows and moving a few bales of hay from the back of the barn; feeding the chickens and giving them fresh, clean water; and emptying and refilling the ducks water pool I still managed to find some energy for carving. Sometimes you get into the carving 'zone' when time stands still and everything goes right. That was this afternoon.
Of course, I drew blood 3 times- minor- and developed a few blisters on my fingers- and hurt all over, maybe coming down with something- but it was worth it. Mr Bluebird thinks it needs some work before he will move in.

Why, you may ask, don't I just use a nice, old fencepost with a hole already in it? Three reasons: first, if I want to enter the piece in a show, I need to make all but the feet and eyes from wood- not found wood; second, that old fence post may have an infestation of bugs or rot that the customer may not want in her house; third, just to prove that I can.
Except for cutting the block to size and drilling the hole, the entire post was carved with hand tools- no power. The butternut split off large hunks beautifully using the large carving chisel and a mallet.
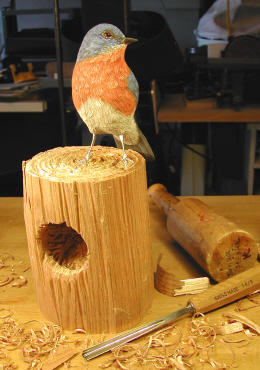
Now the post has some character- old and beat up. I have an unfair advantage over other artists when it comes to rendering old fence posts. With fifty acres of Texas ranch, fenced with some 75 year old posts, I have seen and worked with many posts that looked just like this. The weather eats away the top surface, which I emulated by carving concentric grooves with this round-ended V-gouge. Then I opened out the grooves until there was just a pointed ridge on the top of each area, and then broke up some of those ridges. All that, and the grooves around the circumference of the post, were made by just that one tool.

Then it was time to fit the blank for the babies
into the hole. It looks a little like an egg at this point. Hmmmmm

The babies are just a gleam in Mr Bluebird's eye at this point, but soon they will come to life. They are essentially a relief carving and I'm not sure how to handle it, but the post came out OK- so not to worry. I'll just take away whatever doesn't look like a baby bird and whatever is left will be the birdies.

1 comment:
The babies are really great and i see what you were talking about with the "dead" look but think the result is fine!!!
I can't wait to see the green worm in the beak.
I think you ought to take more pictures of Mr Bluebird in the flowers those are really pretty neat and show up his colors as well.josie
Post a Comment