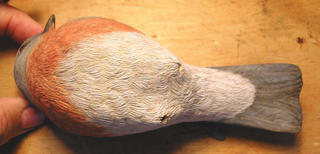
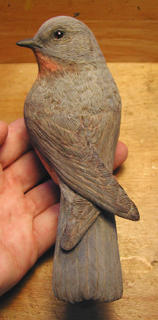
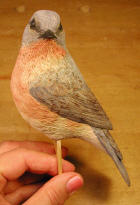
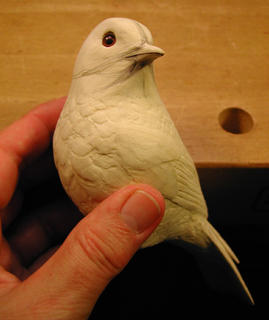
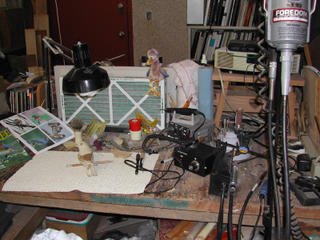
So now it is time to burn these little guys and give them some detail. In the background you can see some of the reference photos I found on the internet. Someone had taken almost day-by-day photos of nestlings in a bird house. It was great to have actual photos for reference. Never use someone else's art work for reference. They may have it wrong.
These three guys are finished, but there is a problem. I'd planned for the third birdie to be sleeping in, so I kept his eyes and mouth shut. Unfortunately this made him look like a dead birdie- not good for the composition. So I ruthlessly carved him away and made his head into the shoulder of the other bird. It was a hard decision to make, but seemed necessary.
Now, I like it better.
You must keep flexible on a project like this and keep open to new ideas.
Here it is all ready for assembly. I've nuked some hay so it won't have any bugs in it. Their nest seem to be mostly composed of dried grasses.
The babies are on a stick, ready to be inserted into the hole in the post hole. They will be secured with epoxy and the nest built around them.
Mr Bluebird looks a little disconcerted by their presents, but he will get used to them after a while.
Oops- he needs to have something in his beak to feed the hungry mouths. Hmm- one green worm coming up.
Monday, October 31, 2005
Friday, October 28, 2005
I'm counting on you all
You will notice a new addition to this page- a site visit counter. This is a simple one that just counts hits- no other data on the viewers. I have been curious how many people are following my progress- and I don't get many comments- so this will be one way to find out. It will only measure this page, but I assume that anyone interested will want to view all the pages.
Now, onto new developments. the baby
birdies have been quite a challenge for
me. I have the book on carving
songbirds by Ernie Muhlmatt and he
carves lots of baby birds, but none of
them are set up in a hole like these are.
So I'm kinda playing it by ear. First I
rough carved them to shape using some
very aggressive, though small, tools.
Some progress has been made here in
refining the shape of the birdie beaks
and setting them apart from one another.
They look strange in the post hole right
now, but with some nesting material
added to the mix I think it will look
just great. These babies will have to
be finished just like the daddy bird,
but not in such great detail, so it
will not take so long. I am crowding
the time limit though, and I still
have to construct a nice base. I'm
planning to make it octagonal, but I
need to check my supplies to see what
beautiful wood I have in stock that
will complement the composition.
Wednesday, October 26, 2005
Fence post posting
Allrighty- the fence post was done in 3.5 hours! Amazing, I had figured it would take a few days. After feeding the cows and moving a few bales of hay from the back of the barn; feeding the chickens and giving them fresh, clean water; and emptying and refilling the ducks water pool I still managed to find some energy for carving. Sometimes you get into the carving 'zone' when time stands still and everything goes right. That was this afternoon.
Of course, I drew blood 3 times- minor- and developed a few blisters on my fingers- and hurt all over, maybe coming down with something- but it was worth it. Mr Bluebird thinks it needs some work before he will move in.
Why, you may ask, don't I just use a nice, old fencepost with a hole already in it? Three reasons: first, if I want to enter the piece in a show, I need to make all but the feet and eyes from wood- not found wood; second, that old fence post may have an infestation of bugs or rot that the customer may not want in her house; third, just to prove that I can.
Except for cutting the block to size and drilling the hole, the entire post was carved with hand tools- no power. The butternut split off large hunks beautifully using the large carving chisel and a mallet.
Now the post has some character- old and beat up. I have an unfair advantage over other artists when it comes to rendering old fence posts. With fifty acres of Texas ranch, fenced with some 75 year old posts, I have seen and worked with many posts that looked just like this. The weather eats away the top surface, which I emulated by carving concentric grooves with this round-ended V-gouge. Then I opened out the grooves until there was just a pointed ridge on the top of each area, and then broke up some of those ridges. All that, and the grooves around the circumference of the post, were made by just that one tool.
Then it was time to fit the blank for the babies
into the hole. It looks a little like an egg at this point. Hmmmmm
The babies are just a gleam in Mr Bluebird's eye at this point, but soon they will come to life. They are essentially a relief carving and I'm not sure how to handle it, but the post came out OK- so not to worry. I'll just take away whatever doesn't look like a baby bird and whatever is left will be the birdies.
Monday, October 24, 2005
Finished bluebird, but not finished composition
Here the orange is getting a lighter coat. Next
the white is lightened and a few details are added
Finally some touches of iridescent paint to bring
the feathers to life.
This is a comparison of the finished bird with the reference that both the customer and I thought was the best photo we could find. I used many other references, but this was the main one.
This back biew of the bird still looks dark, but the light is deceiving. Once he got into the sunlight his feathers really shined.
He thinks he looks mighty handsome- he is even thinking about finding a mate- if only he can get out of the studio. . .
So I took him out for a little sunshine and before I knew what was happening he flew right out of my hand and started to explore the back yard.
This grasshopper thought the bluebird was interesting- but then the bluebird got hungry-
lunchtime!
He checked out the yellow flowers. . .
. . . and then the orange blooms caught his eye. He likes the way they match his breast.
Oh oh- he has spotted a likely cedar fencepost that he thinks will make a great place to raise a family. It has a hole in it that was made
by a woodpecker. Now to find
a bride who will lay some eggs
in the hole- then we will
have babies to feed.
Hmmm- lets see, bugs, insects,
worms, larvae, and catepillars
will have to be brought to the
baby birds. That will be a tough
job, but he is up for it.
Friday, October 21, 2005
Lighten up!
So now the
paint
thickens,
and the
lighter
colors are
applied. It may seem drastic, but this is just the first of the lighter coats.
After the tiny strokes of lighter blue are applied there is a pleasant intermingling of the different shades of blue to create a shimmering effect.
OK- so I just put this one in because it is so cute. The blue is all but complete, but the russet and white areas need lots of lightening.
Going over and over each feather is getting old- so I'd better finish up soon. Tomorrow should be the last day- final lightening and iridescence- then start on the post and babies.
The blue bluebird
Here is a detail of the shoulder after the second coat. I wanted to show how thin the coats are- and that you can see the details of the burned feathers. Also note the blending of the colors to make smooth transition from breast to neck to wing and back areas.
Working this thinly allows me to fool around with colors and placement for quite a while. If I don't like the result I just paint over the previous layer. Eventually, the top coats will carry the day.
The next photo shows me painting one of the third coats on the wing. Actually, I painted pure cobalt first- but that wasn't the right color. So then I mixed cobalt with ultramarine to get the right color. It is real dark now, but I needed that to get sufficient darkness into the details and shadowed areas.
Wednesday, October 19, 2005
Second Coat
Here is a look at my painting work station. It is at my hand-carving bench in the studio, on the second floor of my home. I have lots of brushes for when I teach people how to make the butterflies, hummingbirds, and dragonflies. We use good brushes because you cannot do a good job with bad brushes. If a brush does not cost over $3 it is not good enough. Sorry, but that is just the way it works. You see my duckie helper here- I don't even try to do good art work without his help. Some of my paint tubes are more than 10 years old and the paint is going bad. It will be fun to buy some new tubes soon.
The first coat of paint, the undercoat, was used primarily to define the color areas.
The second coat of paint is not much thicker than the first coat. It is a little darker than the first coat and will make the shadowed areas.
I'm really just staining the wood and not applying paint at this point. I'm a wussy painter- not very bold, but I like the effect that ultimately results from many thin coats.
The color is not very intense,but it is starting to build up. On the belly you can see some discrete greyish lines to indicate shadowed areas.
Now the color will start to be more intense and the fun begins.
The first coat of paint, the undercoat, was used primarily to define the color areas.
The second coat of paint is not much thicker than the first coat. It is a little darker than the first coat and will make the shadowed areas.
I'm really just staining the wood and not applying paint at this point. I'm a wussy painter- not very bold, but I like the effect that ultimately results from many thin coats.
The color is not very intense,but it is starting to build up. On the belly you can see some discrete greyish lines to indicate shadowed areas.
Now the color will start to be more intense and the fun begins.
Tuesday, October 18, 2005
Underpainting
The first coat of paint is called the undercoat. It is usually done very thinly and with muted colors. You know if the paint has been thinned enough if you can paint on a piece of printing and can easily read through the paint. That is very thin, but we don't want to obliterate all the fine burned details, now do we. I am following my own painting scheme here, but refering to the color mixture and details in the book. I was missing about half of the recommended
colors, so I had to improvise. The blue is ultramarine, cobalt, white, raw umber, and a little violet. The russet is burnt siena with a little white and black. The white is white with some of the russet mixed in to warm it up. The black is ultramarine and raw umber. It isn't very pretty now, but succeeding coats of paint will make great improvements. You'll see.
Bluebird, bluebird, burning bright. . .
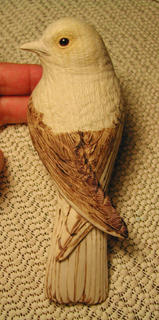
This is the flank of the bluebird after woodburning and before painting. Each of the the feather groups is different and required different techniques in carving, stoning, and burning.
Working on the face area requires a delicate touch and a good woodburner. The hummingbirds I've done were a lot smaller than the bluebird and took a lot less time to burn. This guy took 3 days of 1 hour sessions- probably 5-6 hours all together. I used a fan to pull the smoke away from me, but my eyes still tire after a short while.
This is the finished, burned bird, front view. Some of you have asked for the name of the book I mainly used for this carving. It is:
Carving Award Winning Songbirds, by Lori Corbett. The book is very well done, her directions are easy to follow and she gives lots of information on how to make your own variation on her bluebird. It is a great reference book on carving and finishing birds as well as giving specific plans and instructions for the Cedar Waxwing, Red-Breasted Nuthatch, and Mountain Bluebird.
Here is the back view of the finished burn. Someone asked me how tedious this was and I said that it was like threading a needle- except- try to thread 120 needles in an hour.
Lori Corbett has a neat forum where people talk about her book, and she has a website where you can order the book directly from her. http://www.whisperingeagle.com.
Check it out!
Meanwhile, back at the ranch, I'm going to be painting today. Yippee! Painting is fun and easy.
Friday, October 14, 2005
Half-way Point
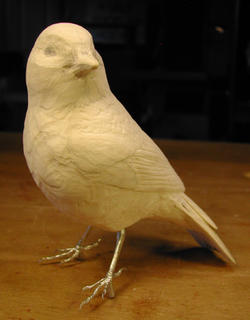
Looks good for finishing by the end of the month. Some more woodburning and the big bird will be ready for paint. I have a lot of experience with painting carvings, so it should not take more than a couple of days.
Since the last update the legs were trial fit into drilled holes, as were the eyes.
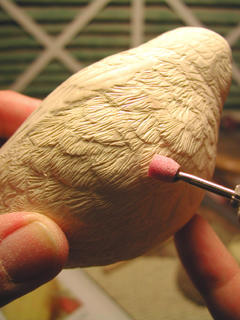
Here I'm using a power carving attachment called a stone. I have modified it to make groves within the feather clusters.
The eyes have been set into their sockets with an epoxy putty. The eyelids are missing and will be added later.
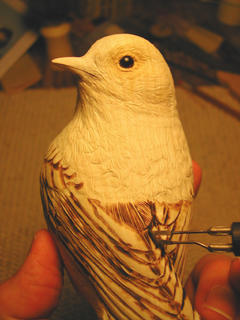
Some of the wing feathers hve been emphisized with the woodburning skew tool. The beak has been thinned more, and I think it is just about right.
The head has been refined a lot. Lots of wood has been removed, and it looks more and more like a bluebird.
You can see the tool in use adding barbs to the wing feathers. I feel at home using the burner- I've burned a lot of carved birds.
Here the left wing is almost done with burning. This is an intense job that is very eye straining, so I limit myself to an hour at a time. If you want a challenge to patience and eye-hand coordination just try to make bird eyelids out of epoxy putty. They are finished here. Doesn't he look intelligent now?
On the left the carving's
wings are nearly done.
I thought you woould like to have a look at the workbench where I'm making the bird.
Reference materials on the left, bird under the light, dust collector in the background, micro-carver next, then the wood burner. Hanging are the powerful Foredom and a lesser Dremel flex shafts. I shudda cleaned up before taking the photo. What a messy workspace!
Subscribe to:
Posts (Atom)