
First decision necessary was how to present the bird, since I won't make a 'bird on a stick' carving. I decided to place the male Eastern Bluebird on an old, weatherbeaten, cedar fencepost; and place a grasshopper in his beak. He will be looking over his shoulder to make sure there are no predators nearby, before he brings the food to his youngsters. On the side of the fencepost is a hole that was probably carved by a woodpecker looking for bugs. In the hole are three hungry, squawking baby bluebirds. 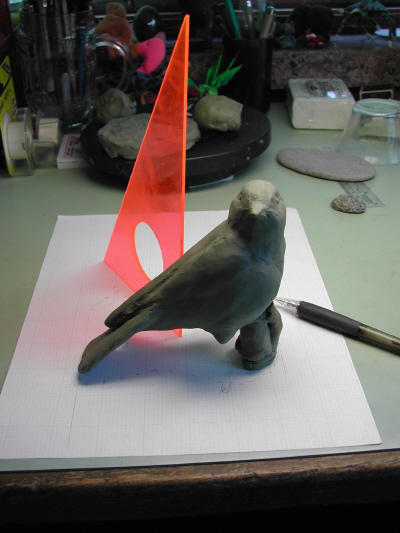
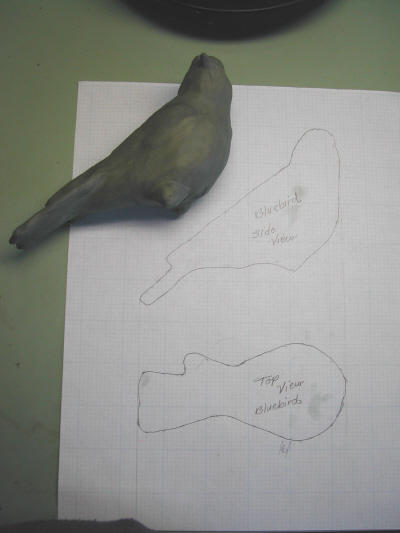 Now I can cut out the pattern, trace it onto a block of tupelo wood, and cut out the blank from which I'll carve the bird. Notice how strange the top view is because the head is turned and is subsumed by the outline of the body. I had tried to sketch this out without the clay model but found it impossible to visualize this relationship.
After bandsawing the block following the pattern lines I had a decidedly weird looking block of wood. It will take a lot of wood removal to make it look like a bird. The top three pieces show the original block and the waste cut from around the bird. Notice that although the sketch and clay model had the bird looking over his right shoulder, he is now looking to his left. Minor detail resulting from placing the pattern on the bottom of the block instead of the top of the block and failing to turn the pattern over. Not to worry, he will look just as good this way.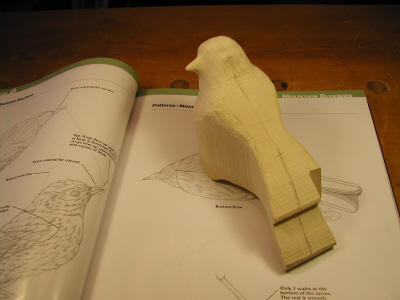
4 comments:
i could never carve a bird like that. my hand would spasm as i was cutting it and totally FUBAR it.
Had a look at your birds and harp. Very well done.
Comment about mistakes when harp making;
It is not the mistakes you make, because you will, it is how you can integrate them into the design.
Quilters say, " if you make one mistake don't worry but do the same thing two or three more time and it becomes a design variation!"
These carvings are great. You must need a keen eye and fingers of a surgeon.Really enjoyed your carvings.
really beautiful.
Well done.
Post a Comment