
 Looks good for finishing by the end of the month. Some more woodburning and the big bird will be ready for paint. I have a lot of experience with painting carvings, so it should not take more than a couple of days.
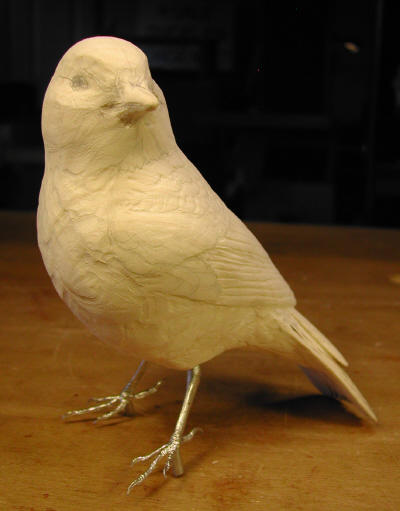
Since the last update the legs were trial fit into drilled holes, as were the eyes.
Here I'm using a power carving attachment called a stone. I have modified it to make groves within the feather clusters.

 The eyes have been set into their sockets with an epoxy putty. The eyelids are missing and will be added later.
Some of the wing feathers hve been emphisized with the woodburning skew tool. The beak has been thinned more, and I think it is just about right.
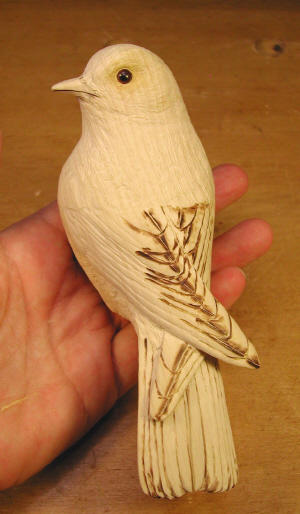
The head has been refined a lot. Lots of wood has been removed, and it looks more and more like a bluebird.
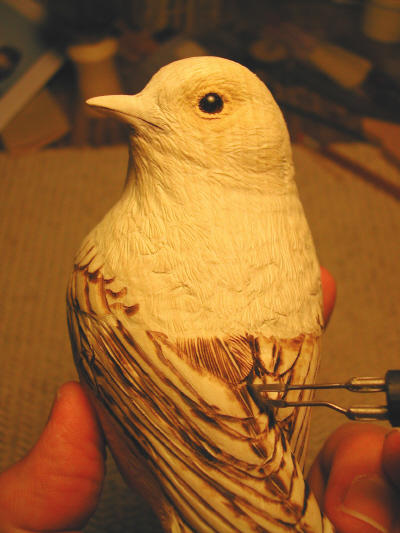
You can see the tool in use adding barbs to the wing feathers. I feel at home using the burner- I've burned a lot of carved birds.
Here the left wing is almost done with burning. This is an intense job that is very eye straining, so I limit myself to an hour at a time. If you want a challenge to patience and eye-hand coordination just try to make bird eyelids out of epoxy putty. They are finished here. Doesn't he look intelligent now?
 On the left the carving's
wings are nearly done.
I thought you woould like to have a look at the workbench where I'm making the bird.
Reference materials on the left, bird under the light, dust collector in the background, micro-carver next, then the wood burner. Hanging are the powerful Foredom and a lesser Dremel flex shafts. I shudda cleaned up before taking the photo. What a messy workspace!
6 comments:
Your bluebird is looking really nice. It is hard to believe that it is only the half-way point, since it looks so much like a bird at this point. I suppose the finishing touches, the painting, and the "accessories" (perch with details) are going to take a while.
As always, your work is very impressive and seeing a blog such as this helps me realize just how much work it takes to create just one of these works of art.
Thanks for sharing your progress. I should have set up a blog for my garage project.
Benjamin
I am really enjoying following your progress -- and learning a lot, too!
Hi Donna,
Love what your doing here, the bird and it's sketch look great so far...I will pop back later on to see how it is all going.
I also love this blog site, it is the best looking one i have see to date.
Your work bench and area has the look of a busy carver with all the right tools, and being neat does not count while work is going on.
Viewing your work is always fun and this blog will teach many other carvers,thanks for posting to all of us about this site.Many will enjoy it as much as I have.
Robert the Owner & Mod of the Knotholes group.
Donna,
Thank you for offering so much information. I am an amateur wood carver and I'm getting pretty decent but forgive me if this is a dumb question. What is the purpose of wood burning the piece if you've already got detail lines on the bird?
Thank you.
Brian.
"What is the purpose of wood burning the piece if you've already got detail lines on the bird?"
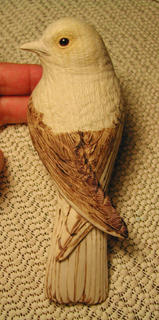
Good question! I had a lot of detail already done with the stones, but I wanted to add some finer detail lines to the breast feathers. Obviously burning greatly increased the level of detailing on the wings and the rest of the body. It is the only way to get the definition I wanted to show through the painting. Donna
From one bird carver to another-
WONDERFUL work. Thank you for showing the details and time it takes to do this.
I don't have my birds online again. But you have inspired me to begin carving again after a long recuperation from injury.
THANK YOU!
Post a Comment